How to Make a DIY Star Wars Death Star Piñata
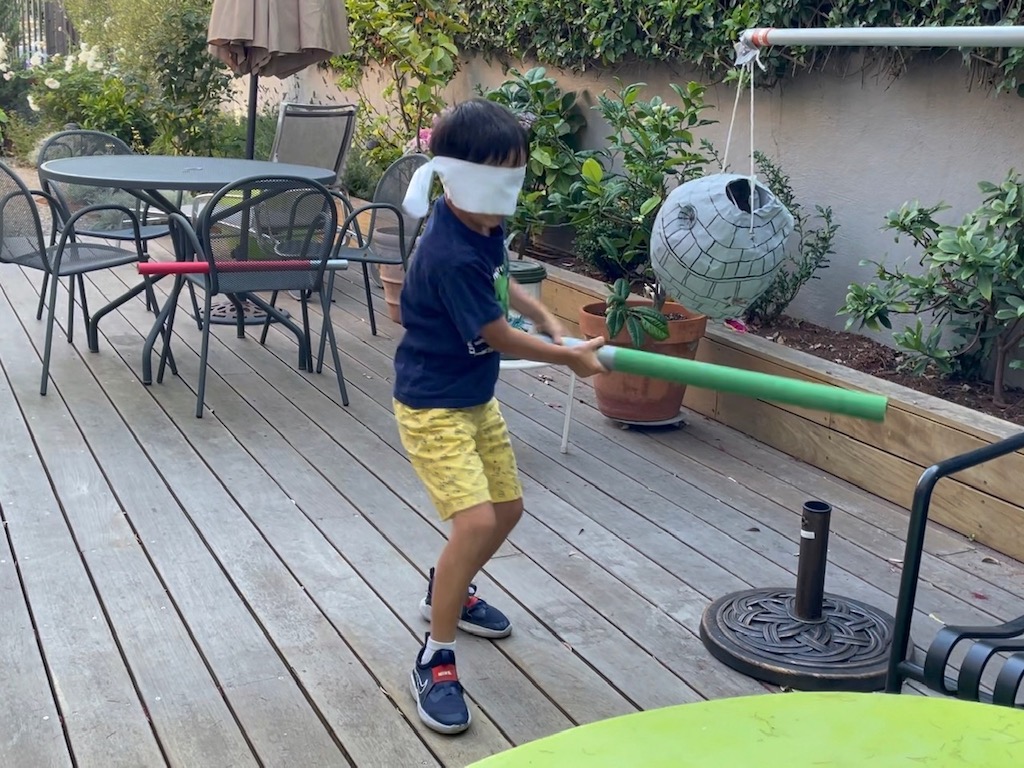
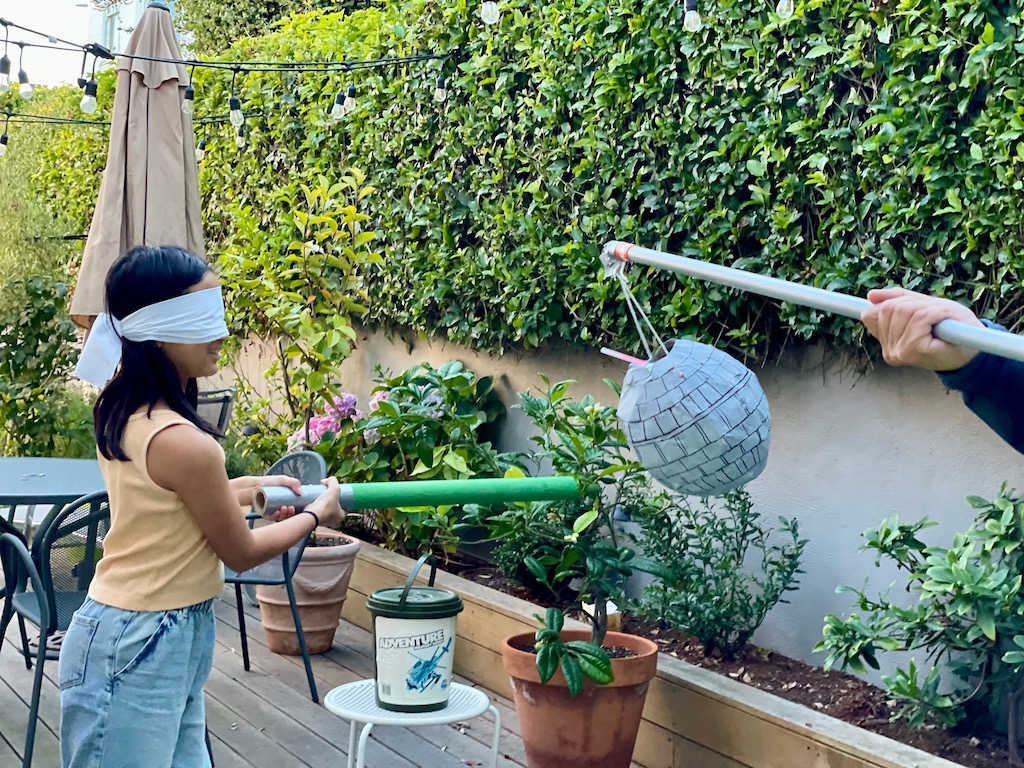
We celebrated N’s eighth birthday over the weekend. He and I made a small Star Wars Death Star piñata for the occasion.
How it Began
Actually, I had been thinking about how I could create a Death Star piñata for awhile, since N loves everything Star Wars. I figured it should be easy to do because it’s just a round ball shape with a concave inset for the superlaser emitter.
So, earlier in the summer, I suggested to N that we might make a Death Star piñata for our annual summer grandkids’ party. N was game and glued the first strips around a blown-up balloon. Then he went overseas to visit with his other grandma for most of the summer.
This grandma dropped the ball–or the balloon–and never finished laying on additional strips until the balloon had deflated. So, the first layer of N’s effort, no longer supported by a balloon base, was now a shaky structure to support more layers.
I should have started again from scratch, but doggedly, I continued. So, what we ended up with was a misshapen ball as a base.
We do the best we can. You can do this one better.
N was not able to paint the piñata in time for our summer party. But it was perfect for our family celebration of his birthday a few weeks later.
How to Make a Death Star Piñata

For the basic piñata instructions, check out the post about how Miss T and I made our first piñata during Camp Grandma three years ago. Basically, you tear strips of paper, soak in diluted white glue and glue strips to an inflated balloon. Do not cut the strips–torn edges will blend together more smoothly.
After gluing on several layers (air dry between layers) and when the piñata is completely dry, burst the balloon with a sharp object to deflate and remove it. Then paint and decorate.
Materials Needed:
- Round balloon
- Newspapers or recycled printer paper
- White school glue such as Elmer’s, diluted with 2 parts water
- Gray tempera paint or acrylic paint
- Plastic sauce cup
- Black Sharpie or other indelible ink pen, with thick point
- String for hanging
- Small toys and treats
- Sheet of gray tissue paper
Tools Needed:
- Bowl or pan for soaking paper strips
- Small, sharp scissors
- X-ACTO knife
- String for determining equator
- Pencil
How to Make It
We take up instructions after the ball is made, painted in gray paint, and dried, per my previous post.
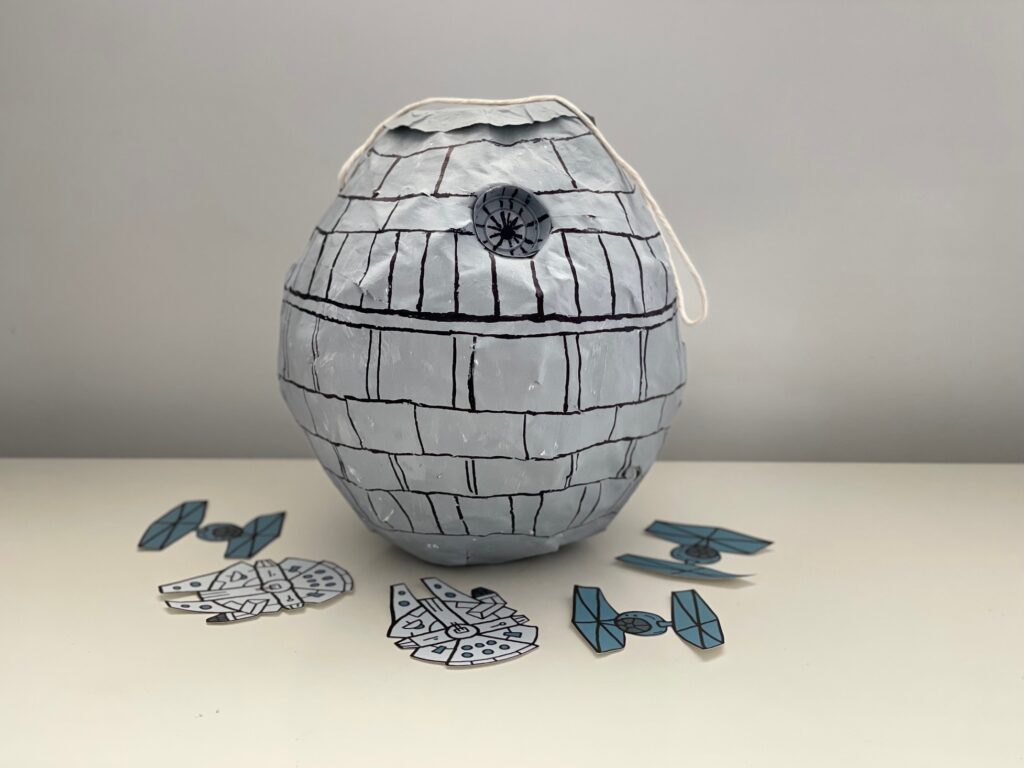
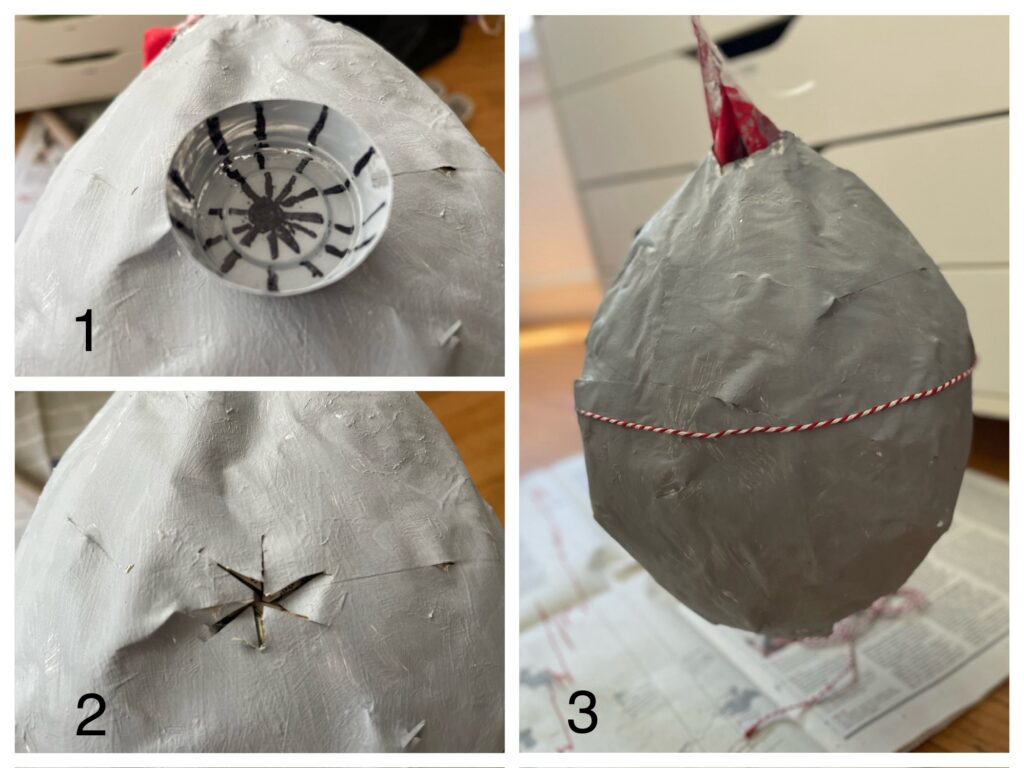
- To make the concave inset for the superlaser emitter–the design element that transforms a plain gray ball into the Death Star–trim down a plastic sauce cup so it’s about half as deep. You’ll need small sharp scissors but be careful. It’s easy to cut yourself with the scissors and the cut plastic edges will be very sharp. Draw black radiating rays from the OUTSIDE of the sauce cup. It’s easier than trying to draw in the cup and the markings will show through the plastic. Once it’s dried, paint the sauce cup gray, from the outside.
- Using the X-ACTO knife, cut slits in a starburst fashion where you want the concave inset to be. BE VERY CAREFUL when piercing the piñata shell. If your knife can’t get purchase, it can slip and you can cut yourself. You might want to make a small slit and enlarge it with scissors if your piñata shell is thin enough. Insert the plastic cup into the hole and lodge it in place.
- To draw the decorations, first, determine an equator line by tying a string around the piñata in the center. Just use your eye judgement. Make a pencil line following the string and remove the string.
- Now add the markings using the black Sharpie. I Googled “Death Star simple drawings” and I found pictures such as this to get an idea for the markings.
- Make holes on either side of the piñata for hanging using the X-ACTO knife or a metal skewer.
- Fill with treats and seal the hole with a sheet of gray tissue paper.
Sign Up!
Don’t forget to sign up for my email newsletter. Every Wednesday, I’ll give you a new idea for an activity or insight to nurture the little ones in your life. Next week, we’ll make a lightsaber.