Turn Grandkids’ DIY Valentines into Beautiful Art Later
I encourage the grandkids to make greeting cards for every occasion, but what’s a recipient to do with them afterwards? This year, we are making DIY valentines that will have a second life as artwork.
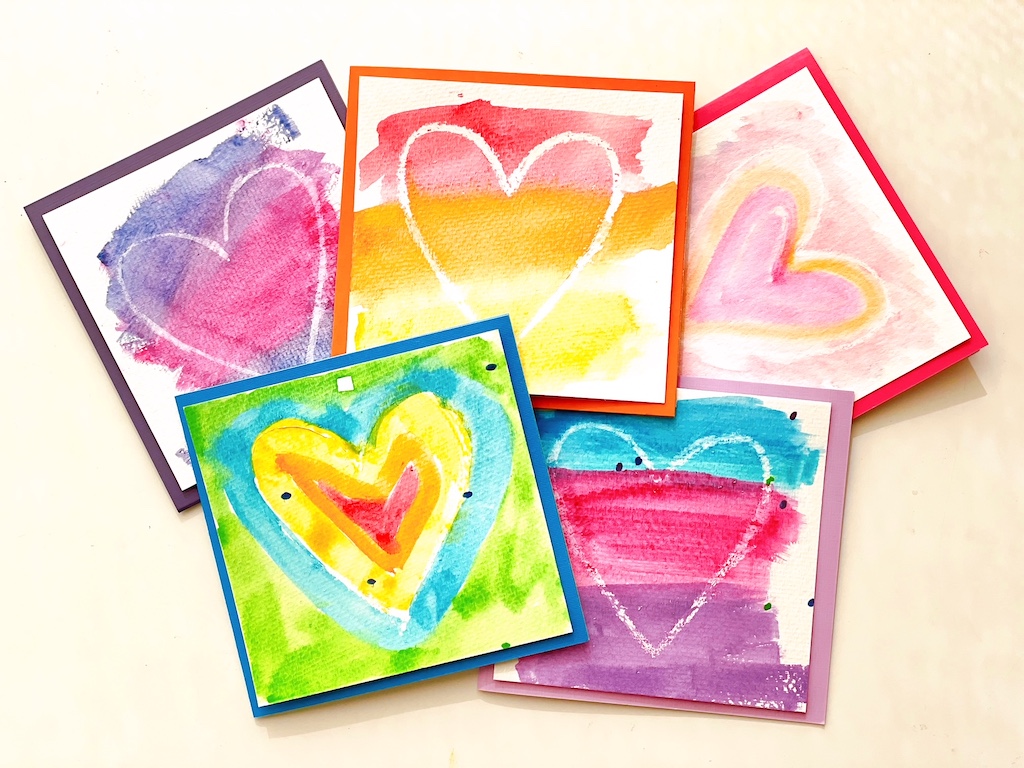
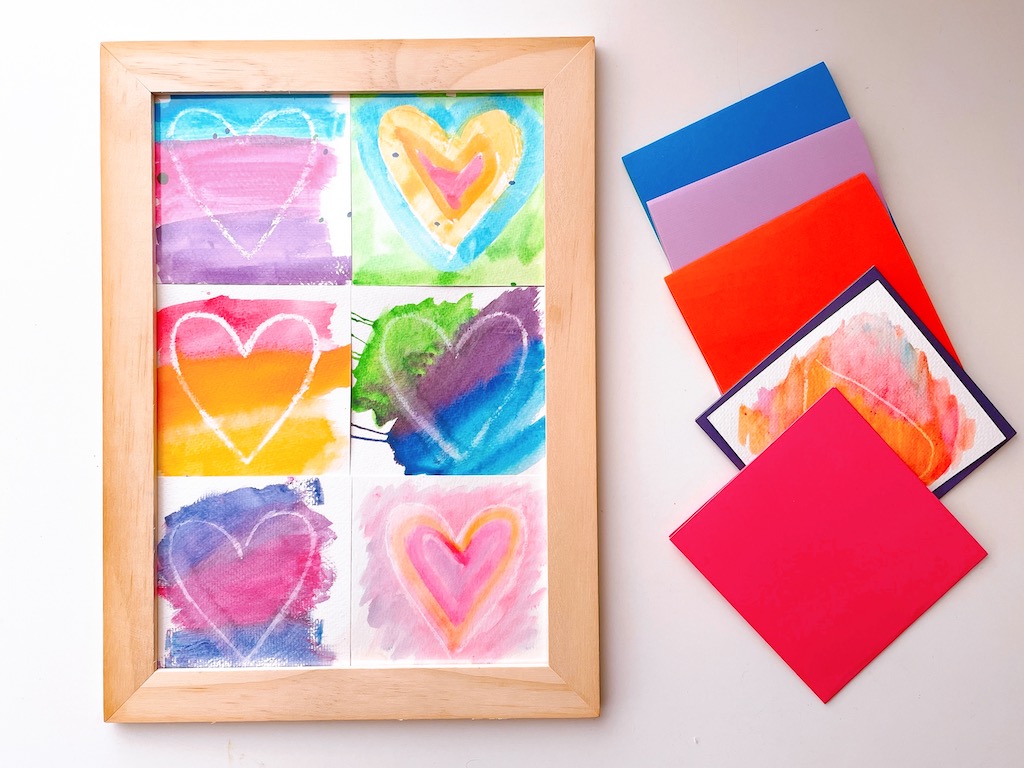
To do this, we would make DIY valentines of a size that would collectively fit a picture frame. After the valentines are distributed, admired, and appreciated, we’ll gather them back, remove the artwork from the front of the card, and create a framable collage.
We Start with a Frame
First, we need to determine what size the card should be. I’m working the dimensions around a cheap frame from IKEA that measures 9 1/2 X 13 inches.
I chose to divide my frame to accommodate six rectangles, two columns wide and, three rectangles deep. So, each rectangle was 1/2 the width of the frame and 1/3 of the length of the frame.
Materials Needed for the DIY Valentines
- Picture frame (about 9 1/2 x 13 inches)
- Water color paper
- Paper cutter
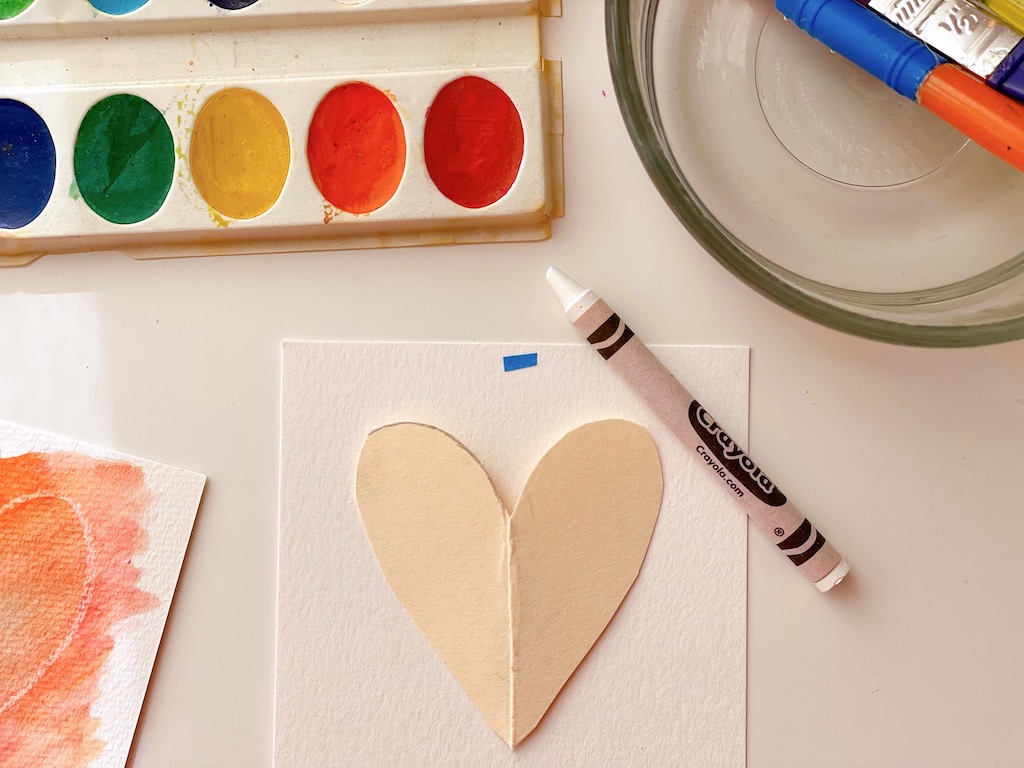
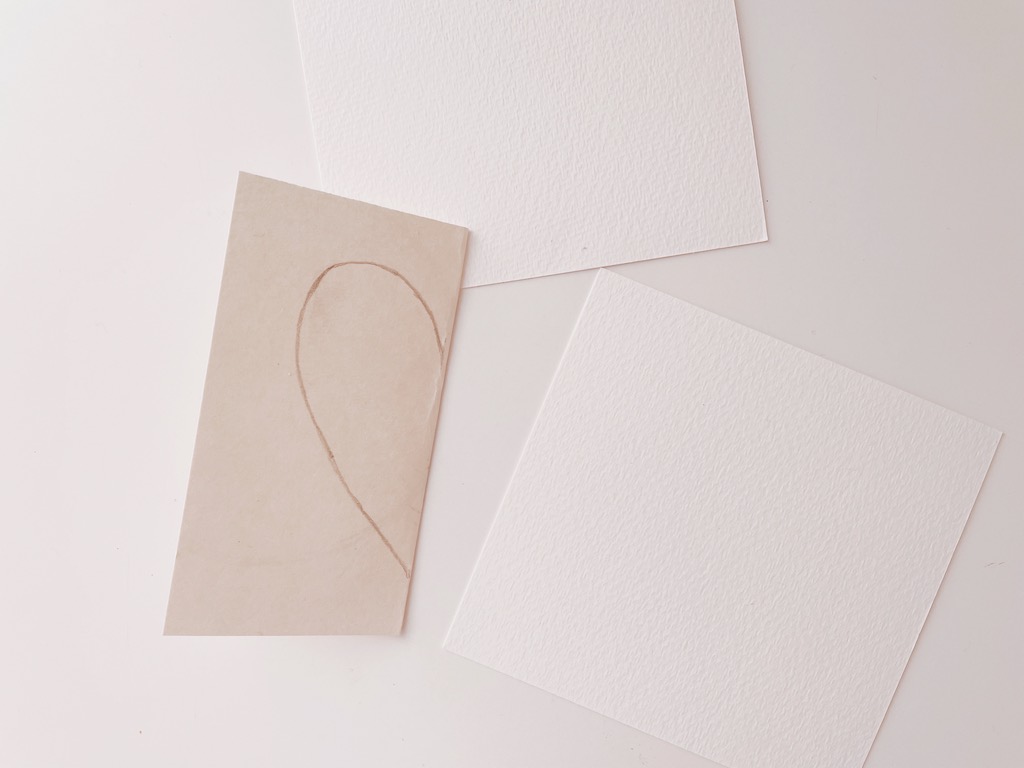
- Sturdy paper, such as an index card, to make the heart pattern
- Scissors
- White crayon
- Watercolor paints
- Paint brushes
- Sentiment stickers, or colored pens to write sentiment inside the card
- Adhesive foam mounts, such as these or glue stick
For another type of Valentine’s Day card, your grandchild can make these.
How to Make the DIY Valentines
- Using a paper cutter or scissors, cut as many rectangles as you need from watercolor paper, based on measurements to fit your picture frame.
- Fold sturdy paper in half and draw half a heart as shown in the photo above. Cut out the heart to use as a pattern.
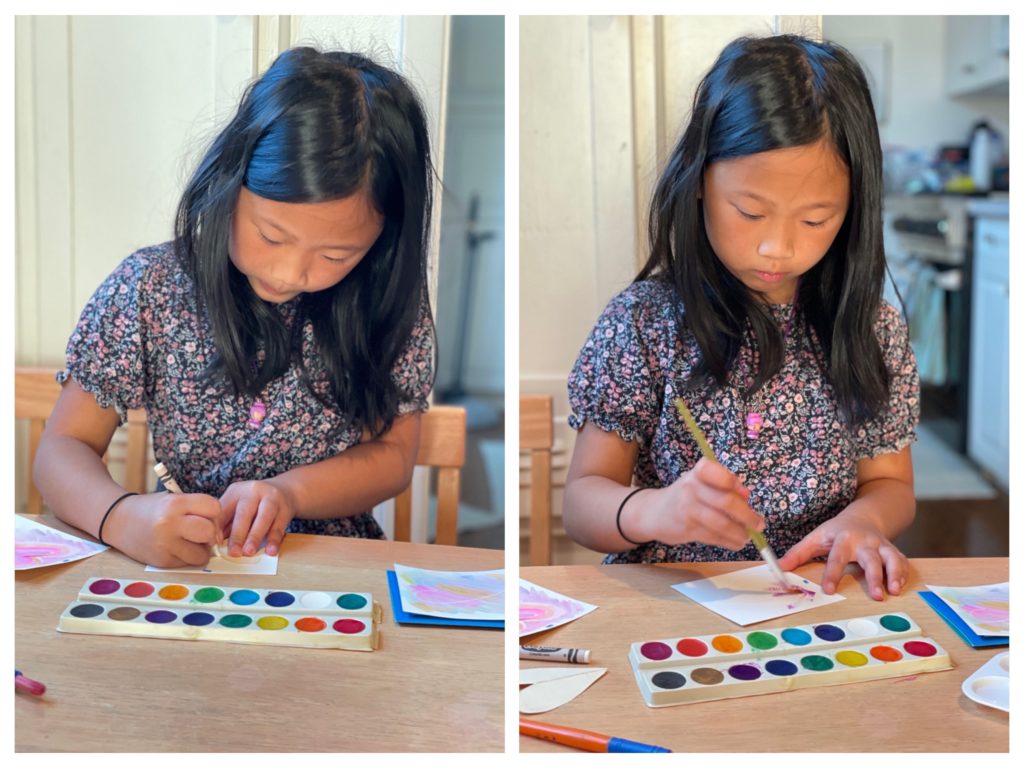
- Trace the heart onto the watercolor paper using the white crayon, pressing firmly on the paper. You won’t be able to see the white crayon.
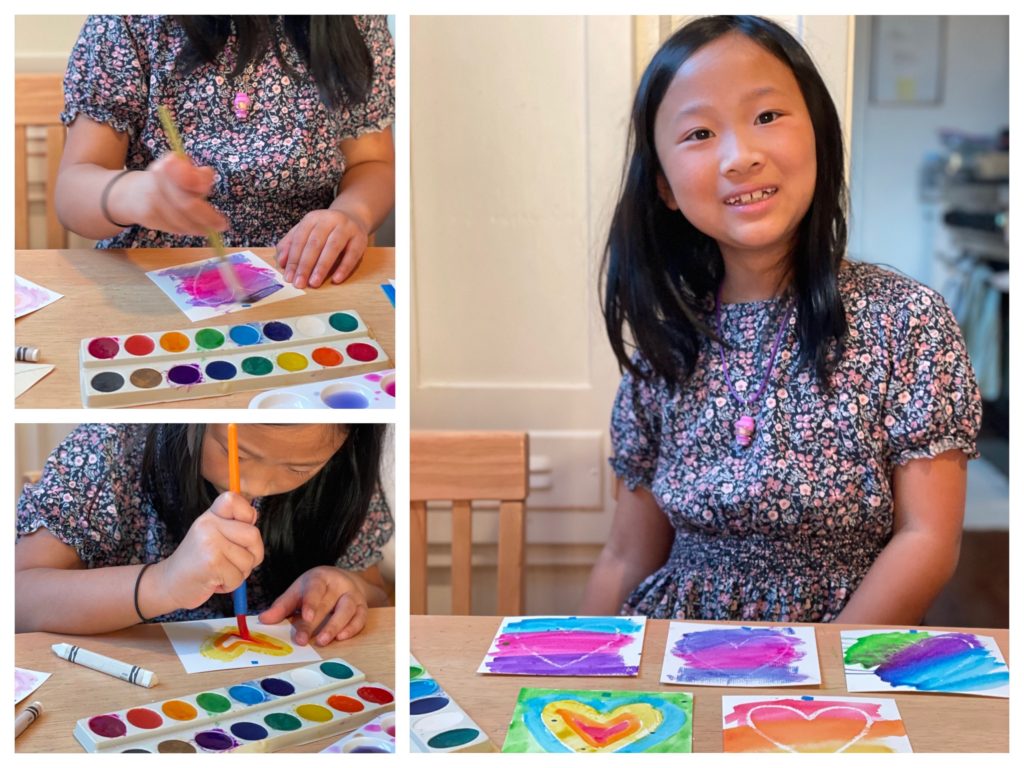
- Paint over the area with watercolor paints; the crayon heart will resist the paint so the heart will magically appear.
- Experiment by adding more or less water to that watercolor paint to try out different effects. Try out different colors. Do not layer too many colors in one spot or the colors will become muddy.
- Allow artwork to dry. Mine dried flat, but if yours curl up, turn them curled side down and weight with heavy books for a few days.
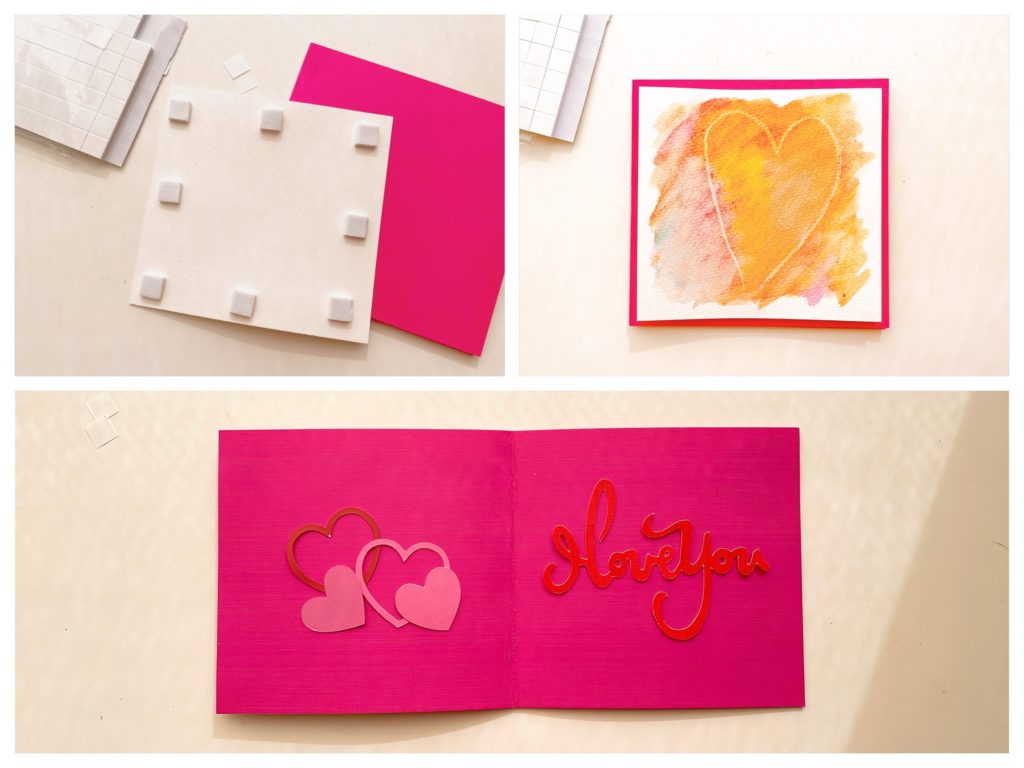
Once the watercolors are dry, cut cardstock a little larger that the watercolor rectangle and twice its size horizontally, so you can make a folding card base.
Use adhesive foam mounts to mount the watercolor art to the front of the card. Or, instead of the foam mounts, you can use photo mounting corners or a glue stick to affix the artwork to the card. Have kids write their valentine message inside.
After Valentine’s Day
After your Valentine’s Day celebration, collect the cards, peel or snip off the foam mounts, and arrange the cards in the picture frame. If you used a glue stick, carefully peel back the artwork from the card, or simply cut out artwork around the card and discard the card.
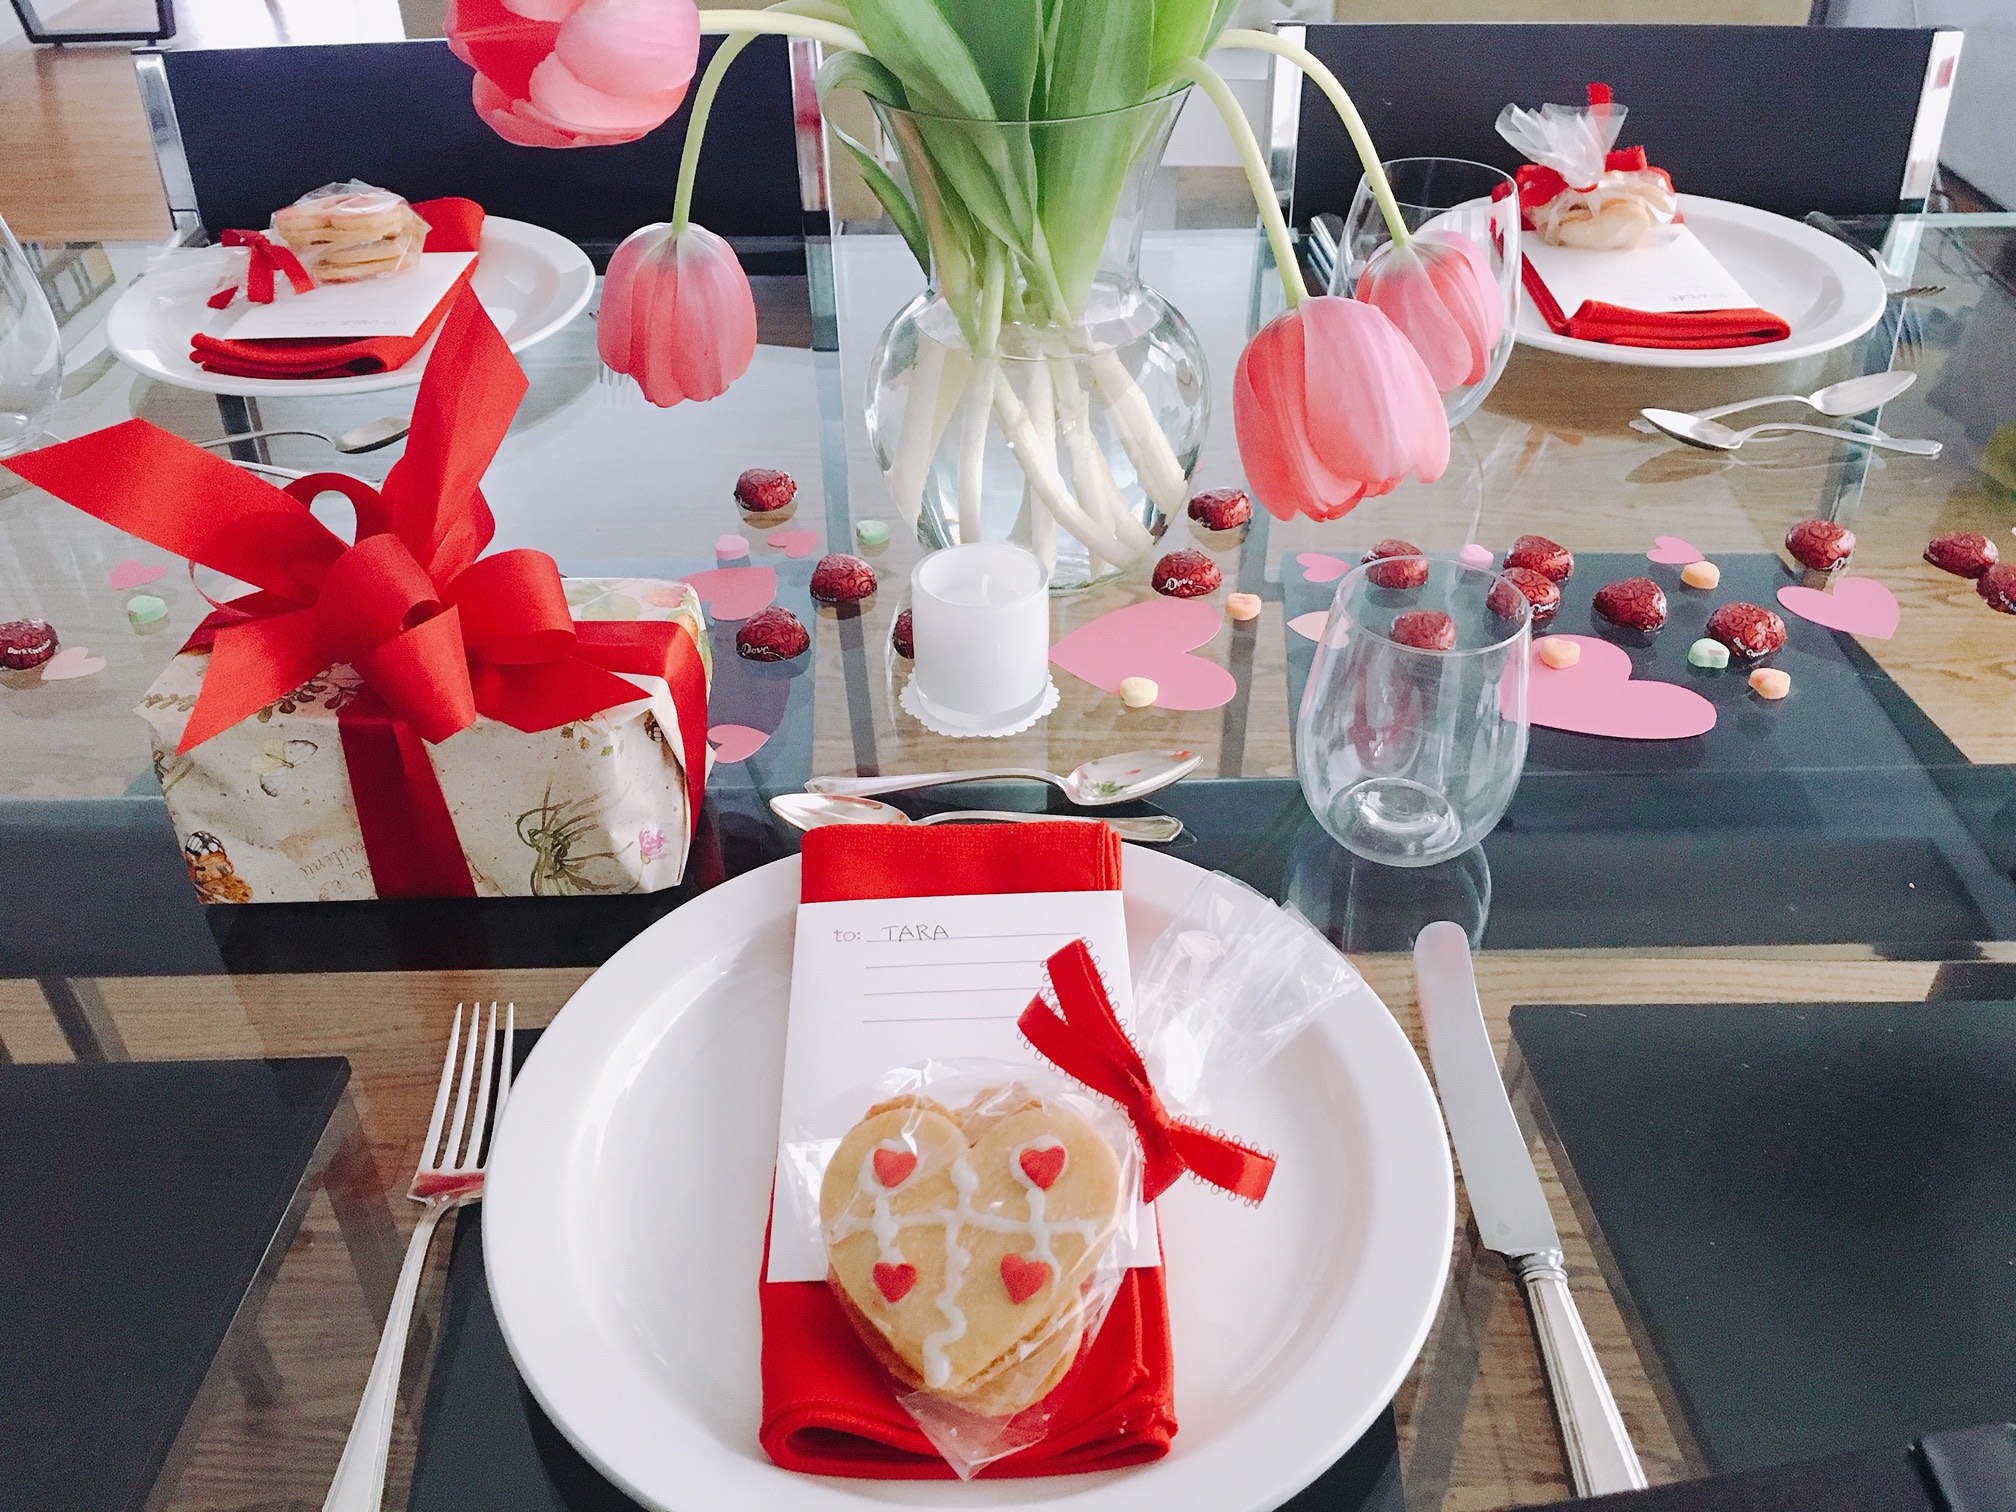
Tips for a Family Valentine’s Day Dinner.
Who gets to keep the framed valentine artwork? Whoever would like it. Miss T might want it for her room or it could be hung in my craft room where the kids work on their art projects.
My mom was someone who couldn’t throw away her children’s precious creations. In fact, she had kept one of my second-grade paintings and a set a miniature hats that I had crafted when I was 12, until she passed away. And I loved her for it.
But with limited space, it’s hard for today’s parents to do the same. This year, our valentines can be returned to the giver without guilt, knowing that they will have another life, and a chance to be appreciated anew.
.
Don’t forget to sign up for my email newsletter. Every Wednesday, I’ll give you a new idea for an activity or insight to nurture the little ones in your life. Come visit!